
The end of the year is quickly approaching, and a common question about year-end is how NetSuite handles 1099 reporting. If you have not used NetSuite to support the creation of 1099’s, now is an excellent time to complete the setup so you are ready to create 1099’s in January.
Below are the three steps you should take now to be ready:
- Install a 1099 reporting bundle
Two 1099 Vendor Payment Report bundles are available for NetSuite. The bundles include saved searches that merge the datasets of transactions, vendors, and chart of accounts to identify transactions for 1099 filing. We have found the Track1099 bundle to provide consistent results for 1099 year-end reporting. - Configure your vendors
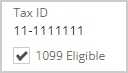
Review your list of vendors that qualify for 1099 reporting. Refer to the IRS link below for which vendors qualify for 1099 reporting. Request current W9s from vendors to streamline the collection of Tax IDs, Legal names, and current business addresses. Update the vendor record in NetSuite with their Tax ID and select the 1099 Eligible checkbox to include vendors in year-end reporting.
About Form 1099-MISC, Miscellaneous Information | Internal Revenue Service (irs.gov)
- Configure your chart of accounts
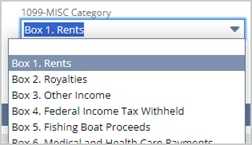
Update the chart of accounts to map the vendor expenses for 1099-eligible vendors to an appropriate 1099-Misc Category. Refer to the IRS 1099-MISC instructions for further guidance on the selection of categories.
What do I need to do in January?
Export and upload into 1099 filing software
A common question is whether NetSuite can print and file the 1099’s. NetSuite 1099 reporting support ends with creating an Excel/CSV file from two Saved Searches (MISC, NEC). You must then load the Excel/CSV files to a third-party application to complete the 1099 generation and filing.